A FRP Cleanroom Wall Panel can look clean and still retain particles, moisture, or disinfectant residue if its surface is too rough or damaged. The right cleanroom wall surface finish supports particle shedding control, microbial control, and chemical resistance. In practice, facilities should evaluate surface roughness Ra, ISO 14644-1 cleanliness requirements, and bioburden recovery—not appearance alone. This guide explains how to select, inspect, clean, and maintain wall panels, including electroplated steel, FRP, powder-coated metal, and hygienic sandwich panels.
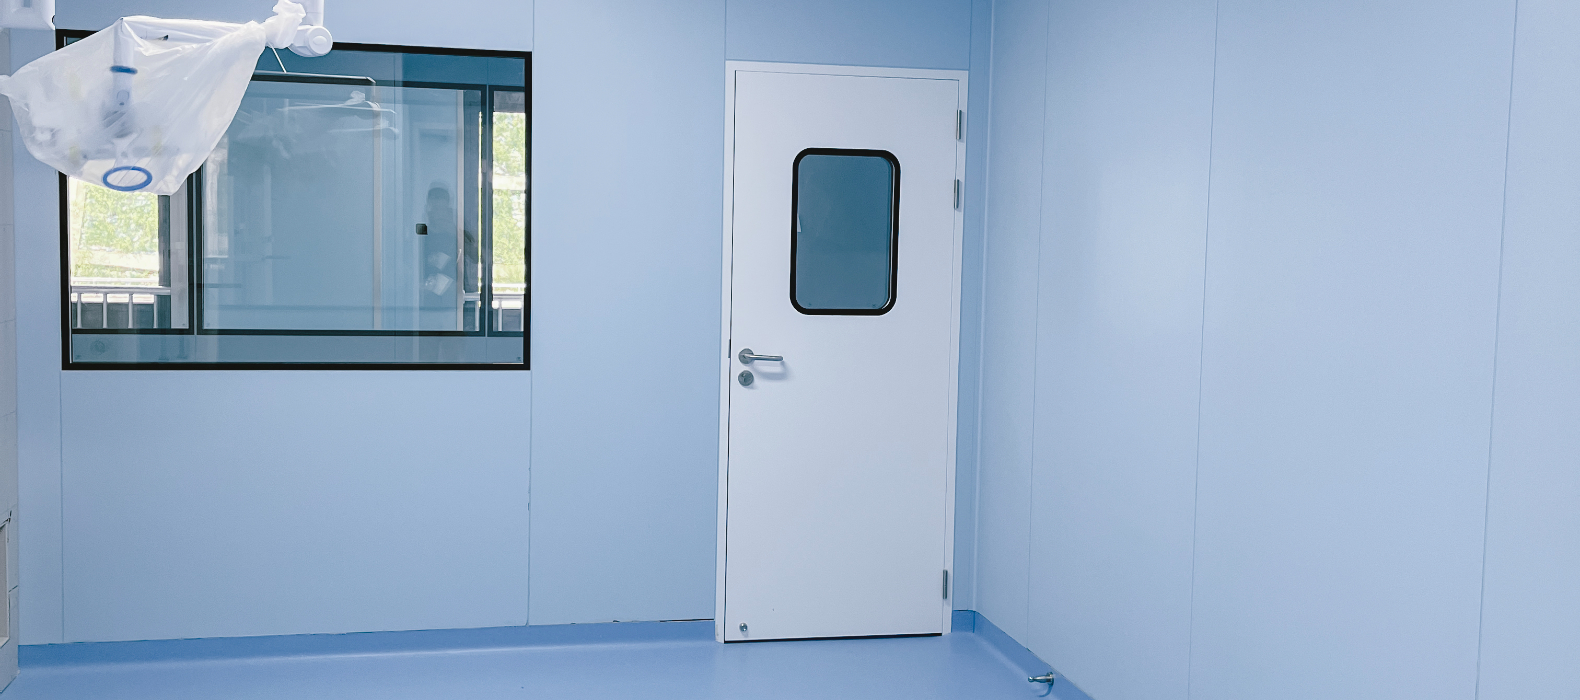
Surface finish determines how easily contaminants attach to a wall and how completely operators can remove them. A cleanroom wall is not only a physical divider. It is part of the room’s contamination-control system.
When the finish is smooth, continuous, nonporous, and resistant to the facility’s cleaning agents, routine wiping can remove a higher proportion of deposited particles and microorganisms. When the finish is porous, cracked, blistered, or heavily textured, contaminants can enter microscopic valleys, coating defects, joints, and sealant gaps.
The most important surface properties are:
An Electroplated Cleanroom Panel typically uses a metal substrate with an electrochemically deposited protective layer. Depending on the plating system, the finish may provide corrosion resistance and a relatively uniform appearance. However, electroplating does not automatically make a wall hygienic.
Inspectors should check:
A plated surface may be suitable for a cleanroom, but its real performance depends on coating thickness, substrate preparation, joint design, cleaning chemistry, and maintenance frequency.
There is no single panel material for every cleanroom. The correct choice depends on the room classification, temperature, humidity, cleaning protocol, impact risk, and chemical exposure.
| Panel finish | Typical strengths | Typical risks | Best evaluation method |
|---|---|---|---|
| FRP | Corrosion resistance, low water absorption, easy replacement | Textured finishes may retain residue; damaged laminate can expose fibers | Check porosity, gloss, texture, impact damage, and disinfectant compatibility |
| Powder-coated steel | Durable coating and broad color availability | Chips and scratches may expose steel and initiate corrosion | Inspect coating continuity, adhesion, and edge protection |
| Stainless steel | Strong corrosion resistance and smooth cleanable surface | Visible scratches, weld discoloration, and poor finishing can create retention sites | Review welds, passivation, surface roughness, and cleaning chemicals |
| Electroplated metal | Uniform protective layer and corrosion resistance when properly specified | Plating defects, exposed edges, and chemical incompatibility | Check coating integrity, thickness documentation, and chemical-resistance testing |
| Hygienic laminate or sandwich panel | Flush construction, thermal performance, and fast installation | Open cores, damaged edges, and failed sealants can become contamination reservoirs | Inspect joints, coved corners, sealants, and impact resistance |
For many pharmaceutical, medical-device, food, and electronics applications, a smooth panel with sealed joints is more important than a decorative high-gloss appearance. A practical specification may define a maximum surface roughness, coating adhesion requirement, cleanability test, and chemical-resistance test rather than simply stating “smooth finish.”
Ra, or arithmetic average roughness, is commonly expressed in micrometers. It describes the average deviation of a surface profile from its mean line. It does not describe every defect, so a surface with a good average Ra can still contain a deep scratch, pinhole, weld crater, or coating blister.
For hygienic applications, specify:
In areas with frequent wet cleaning or high microbial sensitivity, a smooth, sealed finish with no exposed substrate is generally easier to validate than a heavily embossed or porous finish.
An anonymized maintenance case from a medical-device assembly area shows why appearance can be misleading. The wall panels looked white and clean after the nightly wipe-down, but operators repeatedly found dark residue near a lower corner and around a damaged fastener cover. A closer inspection found a small coating chip, a rough sealant edge, and a narrow horizontal ledge behind the protective rail.
The maintenance team first increased disinfectant concentration, but the problem remained. That approach treated the symptom rather than the surface defect. They then removed the damaged sealant, replaced the fastener cover, repaired the exposed panel area with a compatible coating system, and resealed the rail using a smooth, flush bead.
After the repair, the team changed its inspection checklist to include oblique lighting, a plastic scraper test for raised edges, and a documented wipe inspection. The lesson was practical: stronger chemicals cannot compensate for a damaged finish or poorly designed joint. The contamination-control improvement came from eliminating the retention sites.
This type of case is common in facilities where cleaning personnel are blamed for residues that actually originate from panel design, aging coatings, or failed sealants. Easywall cleanroom systems can be evaluated using the same principles: smooth faces, protected edges, sealed joints, and documented maintenance criteria.
Before inspecting or cleaning an Electroplated Cleanroom Panel or another cleanroom wall system, confirm the facility’s environmental and safety requirements.
Divide the room into manageable zones. Record the panel number or location, adjacent equipment, floor-to-wall joint, ceiling connection, corners, doors, windows, utility penetrations, and protective rails.
Photograph existing damage before cleaning. This prevents a later dispute about whether a scratch, blister, or sealant failure was pre-existing.
Use the approved cleanroom method to remove loose particles. Do not begin with aggressive scrubbing because dry particles can act as abrasives and create additional scratches.
Work from the cleanest area toward the dirtier area and from higher surfaces toward lower surfaces. Use a fresh wipe when the current wipe becomes visibly loaded or begins to drag debris across the panel.
Apply the detergent or disinfectant according to the validated procedure. A surface must remain visibly wet for the specified contact time; wiping a solution away immediately may reduce its disinfecting performance.
Do not assume that a stronger concentration is safer or more effective. Excess concentration can leave residue, attack coatings, discolor stainless steel, or degrade sealants.
Use overlapping strokes in one direction, then refold the wipe to expose a clean section. Avoid circular wiping, which can redistribute contamination over a larger area.
Clean the panel face first, then the upper joint, vertical seam, corner, lower joint, and floor transition. Use separate wipes for heavily soiled locations and clean wall areas.
Some detergents and disinfectants require a purified-water rinse to prevent residue. Follow the validated SOP rather than relying on visual appearance.
Residue can create a sticky film that attracts particles and may interfere with surface sampling. If the facility uses alcohol as a final step, verify that the underlying detergent has been removed and that the panel coating is alcohol-compatible.
Use oblique light to identify streaks, pinholes, gloss changes, coating blisters, scratches, and residue. Run a gloved finger lightly across suspected defects only if permitted by the site procedure.
Pay special attention to:
Classify each defect according to its contamination risk:
Define response times in the SOP. A Level 3 defect near a critical process area may require immediate containment, while a low-risk cosmetic defect may be repaired during scheduled maintenance.
After repair, repeat visual inspection and cleaning. Where required, verify surface roughness, coating adhesion, sealant continuity, or microbial recovery according to the facility’s qualification plan.
Do not return a repaired panel to service solely because the patch matches the surrounding color. The repaired area must also be smooth, sealed, chemically compatible, and cleanable.
Problem: Decorative texture increases the effective surface area and can retain particles or disinfectant residue.
Solution: Use a smooth, nonporous finish in critical areas. If texture is unavoidable, qualify its cleanability using the actual wipes and chemicals used in production.
Problem: A coating may look durable but soften, discolor, crack, or lose adhesion after repeated exposure to disinfectants.
Solution: Obtain chemical-resistance data for the exact coating and exposure conditions. Test the expected disinfectant, concentration, temperature, contact time, and wipe frequency.
Problem: The flat panel is easy to clean, but a failed sealant bead or unsealed cable penetration retains moisture and contamination.
Solution: Specify flush joints, radiused corners where appropriate, sealed penetrations, and compatible sealants. Include these areas in routine cleaning verification.
Problem: Ordinary paint can shed, absorb chemicals, or create a raised repair edge.
Solution: Use a manufacturer-approved repair system. Blend the repair smoothly, remove loose coating, clean the substrate, and document the cure time before cleaning or production use.
Problem: Abrasive pads can increase Ra, create directional scratches, and remove protective plating or coating.
Solution: Start with the least aggressive approved wipe and detergent. Escalate only through a documented procedure and verify that the finish has not been damaged.
Problem: A passing surface test does not prove that the panel will remain cleanable after coating damage or sealant failure.
Solution: Combine microbial or ATP monitoring with visual inspection, cleaning records, defect trending, and surface-condition checks. Each method measures a different part of the hygiene system.
Validation should connect the surface specification to the actual contamination risk. A useful program can include the following elements:
ISO 14644-1 classifies airborne particle concentration, but it does not by itself define every wall material or surface-finish requirement. Hygienic design also requires control of deposited contamination, cleanability, moisture, and maintenance condition.
| Frequency | Recommended activity |
|---|---|
| Every cleaning cycle | Check visible residue, streaks, loose coating, and obvious sealant damage. |
| Weekly | Inspect corners, lower wall sections, door frames, rails, and high-touch locations under oblique light. |
| Monthly | Trend defects by location and review repeated cleaning failures or microbial excursions. |
| Quarterly | Inspect joints, penetrations, coating adhesion concerns, corrosion, and panel movement. |
| Annually or after major changes | Review chemical compatibility, cleaning validation, panel condition, and the need for surface roughness or recovery testing. |
Facilities should shorten the inspection interval in wet rooms, high-traffic corridors, areas exposed to aggressive chemicals, and locations where carts or equipment repeatedly strike the walls.
Surface finish affects hygiene through particle retention, microbial recovery, moisture control, and cleaning repeatability. A suitable panel is smooth, nonporous, chemically compatible, resistant to shedding, and correctly sealed at every joint.
The practical goal is not to make a wall look glossy. The goal is to create a surface that can be cleaned consistently, withstand the approved chemicals, and remain free from contamination traps throughout its service life. Smooth finish, sealed construction, validated cleaning, and documented maintenance provide the strongest foundation for cleanroom hygiene, particle control, and surface cleanability.
No. Gloss can indicate a relatively smooth surface, but it does not prove low porosity, low Ra, chemical resistance, or sealed joints. A high-gloss panel with damaged edges can be less hygienic than a lower-gloss panel with a continuous, durable, nonporous finish.
It can be suitable when the plating system, substrate, joints, sealants, and cleaning chemicals are properly qualified. The specification should address coating continuity, corrosion resistance, surface roughness, cleanability, and repair procedures.
The required value depends on the process and applicable hygienic-design criteria. Rather than copying a generic number, define the maximum Ra through a risk assessment and verify it on representative panels, seams, and repaired areas.
Many FRP systems tolerate common alcohol-based disinfectants, but compatibility depends on the resin, gel coat, laminate, concentration, contact time, temperature, and wiping frequency. Confirm the product data and perform a site-specific compatibility check before routine use.
First determine whether the scratch exposes the substrate or creates a contamination-retention site. Clean and isolate the area, remove loose material, use an approved repair system, create a smooth transition, reseal affected joints, and document the repair. Deep damage may require panel replacement.
Common causes include excessive disinfectant concentration, insufficient rinsing, incompatible detergent, incomplete drying, or repeated application without residue removal. Review the SOP, verify chemical concentration, confirm contact time, and check whether the coating or sealant is degrading.
Replacement should be based on condition and cleanability rather than a fixed calendar date. Replace panels when they have exposed substrate, delamination, corrosion, persistent contamination retention, structural damage, or a finish that no longer withstands the validated cleaning process.
最新ニュース
How to Choose the Right Cleanroom Panel Core Material?
 Sep. 29, 2026
PCGI vs. Stainless Steel vs. HPL Cleanroom Panel Surface Coatings
Sep. 28, 2026 
How cleanroom Panel Thickness Affects Cleanroom Performance?
Sep. 25, 2026 
How Cleanroom Panels Support Contamination Control?
Sep. 23, 2026 
VHP Sterilization: Panel Coating Resistance
Sep. 21, 2026 24 時間以内にご連絡いたします。または、毎日午前 9 時から午後 12 時までお電話ください。
+86 139 6255 5162
見積もりを依頼する
技術革新、製品の品質は企業の魂、市場の需要顧客満足度は企業の命
 English
  Chinese (Simplified)
  French
  Russian
  Portuguese